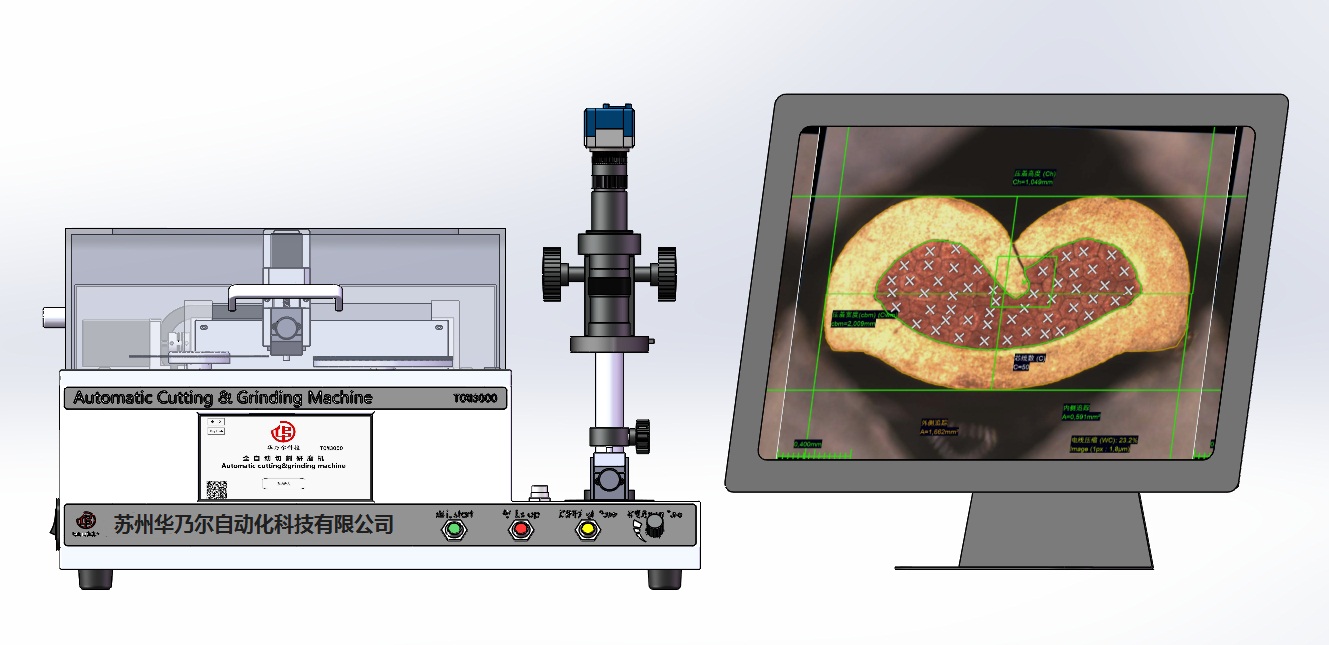
This terminal section analyzer is an integrated fully automatic cutting and grinding analysis instrument, with built-in PLC programming for automatic cutting and grinding. The applicable range of wire diameter is AWG46-- AWG00 (0--50mm2). This system is suitable for terminal cross-section analysis and testing requirements in industries such as automobiles, home appliances, electronics, and new energy。
2、 System Characteristics
1. No resin solidification required
Previously, resin solidification and hardening cutting; Then rough grinding, polishing, time-consuming and laborious, making a sample takes several hours. Now this product does not require resin solidification, automatic cutting and grinding, and can be completed within 5 minutes after testing a sample.
2. Fully automatic cutting and grinding
Automatic cutting and grinding are integrated, and all front actions are completed automatically on four axes.

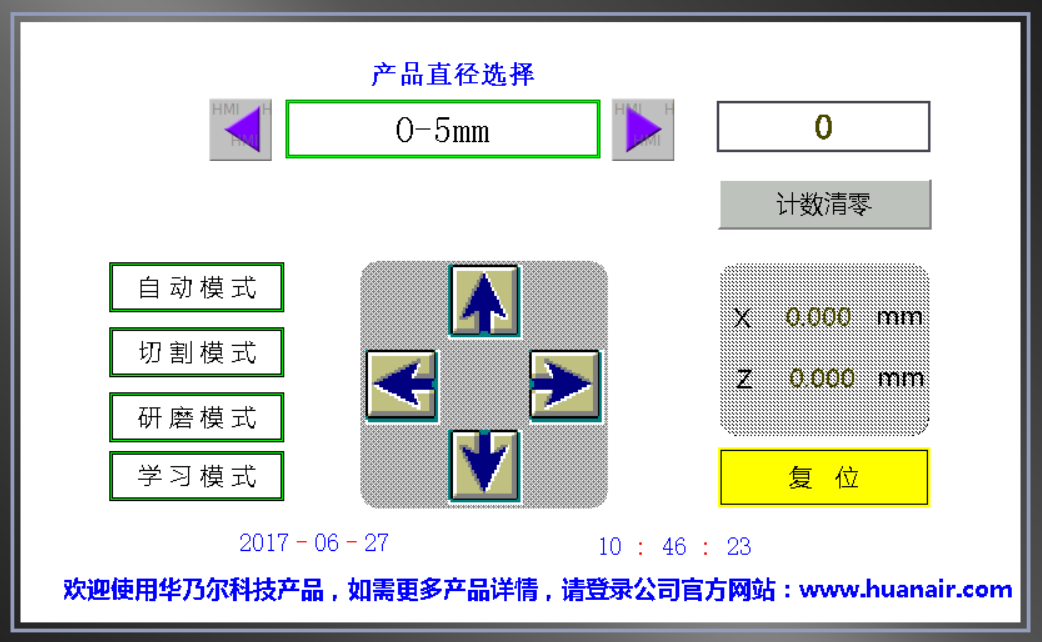
3. The cutting and grinding machine table has a 7-inch touch screen cross-section in both Chinese and English, with no pressure during operation

It can be cut separately, polished separately, or fully automatically cut and polished,
Comes with a "Learning Mode" that can be operated by looking at pictures (exclusive to the industry); Even customized parameters can be set by customers for personalized cutting and polishing, as long as it can be clamped, it is not a problem;
4.Terminal specialized fixtures can correspond to various sizes of terminals
Exquisite stainless steel material fixture, fine tooth clamping, a good assistant for precision cutting, corrosion-resistant;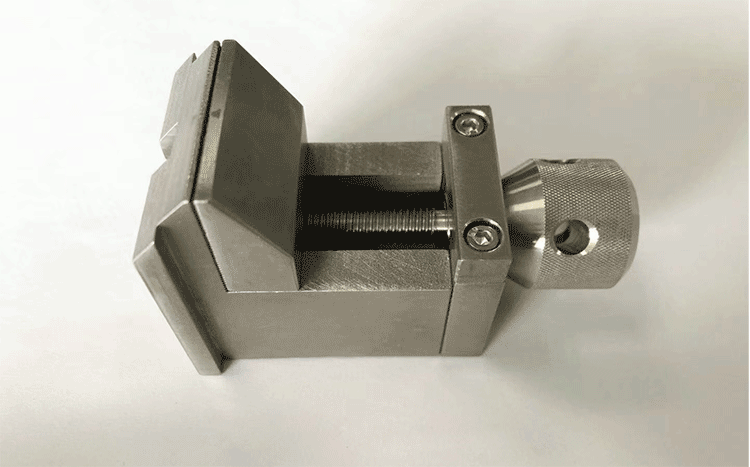
5. Professional terminal analysis software in both Chinese and English (exported to the Asian and European markets), supporting the Windows operating system; Can analyze compression ratio C/R, C/H, C/W porosity and other standard test data, fully meeting standards such as VW60330, Renault 36-05-019/- G, PSA 9634115099, Uscar, QC T 417.1-2001.
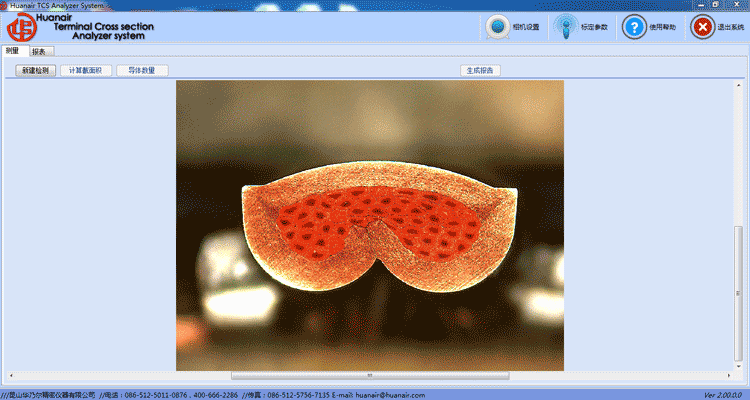
6. The software has automatic AI function, and the test product does not need to be placed in the center, as long as it is in the center of the image, it will automatically rotate for testing; Automatic testing, one click export of terminal section test report (Excel format), can be saved or printed。
3、 System Structure and Configuration
1. German SEW motor high-power precision cutting motor (can achieve power outage stop and continuous cutting functions); Shinano precision grinding and automatic lifting motor from Japan;
2. Color high-definition 7-inch touch screen control
3. Misumi ball screws from Japan and silver slide rails from Taiwan;
4. X-axis Shinano motor;
5. High definition microscope, high-definition industrial camera: German Basler 5 megapixel CCD camera; 0.7-4.5X, total video magnification: 65-419X
6. Applicable range of wires (AGW00- AWG46): 0.01mm2~50mm2
7. Power supply: AC100V~AC240V, power: 750W (excluding computer)
8. Imaging system software: Professional terminal image measurement and analysis software (X-Scan), with Barcode scanning option
9. Cutting blade specifications: Φ 125X0.5mm
10. Grinding sandpaper: 125mm/2000#
11 standard calibration ruler 0.01/10mm
12. Terminal metallographic accessories (cleaning solution)
13. Lighting source: Integrated pure white LED light source control
14. LCD all-in-one computer
| XX汽车部件有限公司 | |||||
| 端子截面分析报告 | |||||
| Terminial Cross Section Analyzer Report | |||||
| 制造商 | 苏州XXX汽车部件有限公司 | 送检日期 | 2012-7-20 | ||
| 联系人 | 赵XX | 上下刀模规格 | 机台号 | M13# | |
| 端子/线型 | T3231/AWG18 | 线型 | AWG 18 | ||
| 测量设备 | TCM2000 | ||||
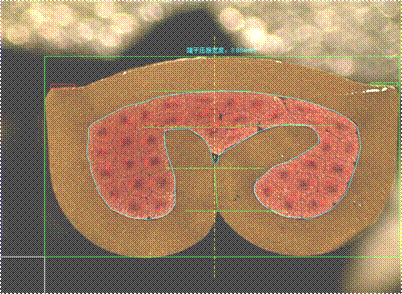 | |||||
| 测试结果 | 名称 | 数值 | 标准 | 结果 | |
| Name | Value | Standard | Result | ||
| 端子压接高度 | 2.250mm | '+/-0.05mm | √ | ||
| C/H:Crimp Height | |||||
| 端子压接宽度 | 3.884mm | '+/-0.05mm | √ | ||
| C/W:Crimp Width | |||||
| 高度/宽度比率 | 57.9% | % | √ | ||
| (C/H)/(C/W) | |||||
| 初始电线面积 | 3.000 | As requirement | √ | ||
| Initial area | |||||
| 原端子厚度 | 0.400 | As requirement | √ | ||
| Original thickness | |||||
| 端子压接面积 | 2.570mm2 | / | √ | ||
| Terminal crimping area | |||||
| 截面缩小比 | 14.3% | 5%--35% | √ | ||
| Narrow cross-section than | |||||
| 压缩比率 | 85.7% | 65%--95% | √ | ||
| C/R:Compression Ratio | |||||
| 压接线数 | 37 | As requirement | √ | ||
| Cross count | |||||
| 支撑角度 | 3.892 | 0≤α≤30度 | √ | ||
| Bending angle | |||||
| 毛刺高度 | 0.049mm | ≤1X底厚 | √ | ||
| B/H:Burr Height Gh | |||||
| 毛刺宽度 | 0.266mm | ≤0.5X底厚 | √ | ||
| B/H:Burr Width Gb | |||||
| 支撑高度 | 0.461mm | ≥1X底厚 | √ | ||
| La Supporting height | |||||
| 底部厚度 | 0.388mm | ≥0.75X底厚 | √ | ||
| B/T:Base Tickness | |||||
| 羽翼末端间距 | 0.021mm | ≤0.5X底厚 | √ | ||
| CFE:Crimp Face Ends | |||||
| 压接翼与底部高度差 | 0.383mm | ≥0.5X底厚 | √ | ||
| F/C:Face End Clearance | |||||
| 间隙率 | 14.3% | 5%--35% | √ | ||
| Air inclusions | |||||
| EDGE(毛刺)宽率 | 18.3% | % | |||
| Burr Width Ratio | |||||
| 壁厚变化率 | % | ||||
| Base Thickness Ratio | |||||
| 端子拉力测试 | % | ||||
| Pull Strength | |||||
| 外观判定 | |||||
| 1.线芯未呈蜂窝形或有间隙 | √ | 2.羽翼至端子壁距离过近 | √ | ||
| 3.羽翼至端子底距离过近 | √ | 4.毛刺高度大于材料厚度 | √ | ||
| 5.毛刺宽度大于材料宽度的1/2 | √ | 6.压接部位与端子体之间扭曲 | √ | ||
| 7.羽翼尖高度差超出材料厚 | √ | 8.压接裂纹 | √ | ||
| 9.羽翼未封闭或弹起 | √ | 10.芯线漏出或夹在羽翼中间 | √ | ||
| 合格/**切片照片若有1-10项中任何一不合格项(被选中),此压接即为不合格 | OK | ||||
| 备注 | |||||
| 检测人 | 周小姐 | 检测日期 | 2013-7-20 | ||


